


Southbridge "X-Clamp"-Fix
Clicks: 144649
Author:
| Error codes that can be fixed with this method: | ||
|---|---|---|
| Primary | Secondary Error code | |
 1RLOD 1RLOD | E67; E69; E71; E73; E76; E79; |
|
 2RLOD 2RLOD | ||
 3RLOD 3RLOD | 0010; 0021; | |
 4RLOD 4RLOD | ||
What you need(IF YOU BOUGHT A KIT FROM THE STORE):
- A disassembled mainboard
- electrical tape, to isolate all components around the southbridge that might get in touch with the metal plate or the washers and short out...
- pan head screw driver
(* - a dremel/metal saw/ sand paper -> only needed if you choose the first method)
What you need(IF YOU DIDNT BUY THE KIT):
- A disassembled mainboard
- A piece of metal(you can take that from the metal shield of the case) or a piece of wood, thin one of course, just something that is solid enough to act like a metal plate...(if you got one of the heatsinks that come with the Talismoon Whisper Max you could also use these :))
- A sharp scissor to cut the metal
- A 2mm drill(3mm works as well if you dont have one)
- 4x M2 machine screws(10mm)
- 4x M2 nuts
- electrical tape, to isolate all components around the southbridge that might get in touch with the metal plate or the washers and short out...
- pan head screw driver
The pictures were resized so just click one to see the high def version of it...
Well lets start...
1.0) Tutorial for those who bought a kit from the store(Others scroll -> 2.0)
First of all there are two ways to install the southbridge X-Clamp Fix kit, the first one(1.1) requires you to cut/sand a slight bit out of the GPU heatsink, thats the best way yet requires a little more time.(All 4 screws are used and can be adjusted)
The second way(1.2) would be the alternative "clipping" method, this means you dont have to modify the GPU heatsink, you screw in the 3 screws except the one pointing to the GPU heatsink and then use the GPU heatsink to apply pressure on the 4th corner.
This works quite well and has the same effect like when you use 4 screws but you loose the ability to adjust the pressure on this corner because there is no screw.
1.1 The cutting method(4 screws, cutting/sanding required)
Your mainboard should already be disassembled so that you got a clear view on the southbridge(the GPU heatsink was taken off).
Now take a stripe of electric tape or something similiar and put it on the big capacitor this is the only one that could possibly get any close to the metal plate and cause a short.

Then take your southbridge plate

And position it on top of the southbridge chip(thats the one on the picture above, on Jaspers+ the chip looks a little different it is black)
Then stick the first screw through the bottom of the mainboard apply a nut on top and screw it down so that the screw doesnt fall out anymore, repeat that for the 3 remaining screws.
When all nuts are applied tighten the screws just about tight, so that they dont move anymore but also dont flex the plate, thats about the right tightness, you can still tighten it more if needed later.
Should look like this now:

Then take your GPU heatsink, thats the rather flat aluminum one, some got an addon heatsink, the one on the picture does not but its the same principle.
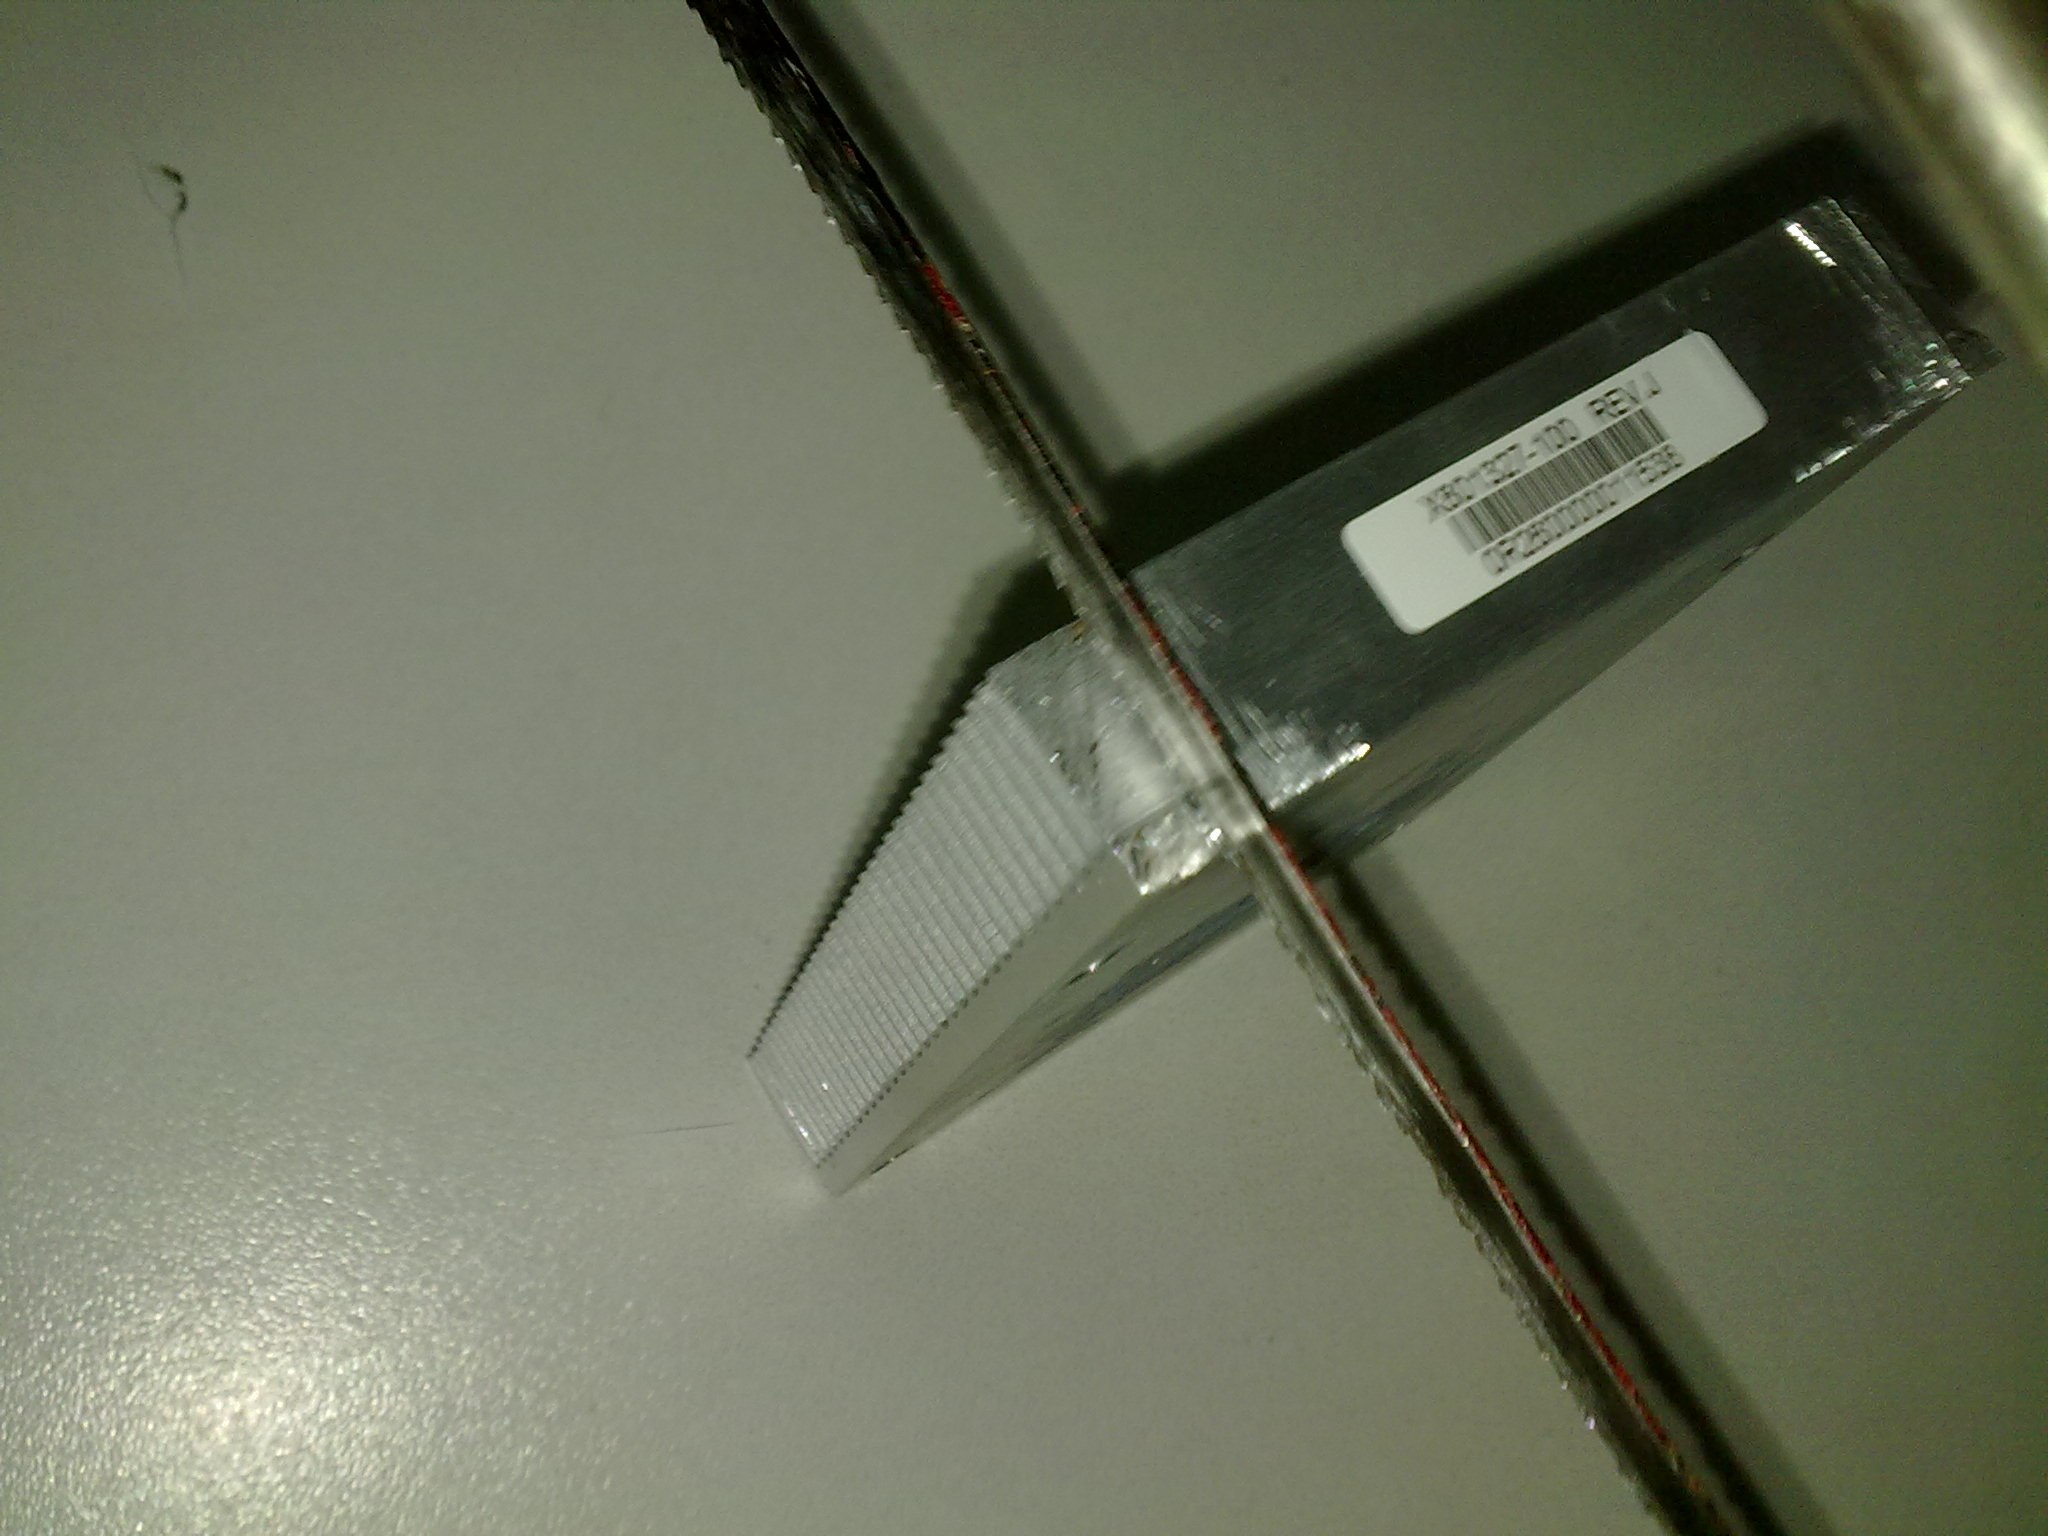
1.1.1 Cutting the GPU heatsink with a metal saw/dremel etc.
Then take your dremel or saw and cut a tiny bit out of the heatsink, you need about 1mm more space, easiest is to just cut out the very first fin, like I did. That takes like 5 minutes if you are unexperienced and using a rusty bowed old metal saw like me :P, a dremel would be way quicker I think.
Here some pictures so that you get an idea:

1.1.2 Sanding the bit out of the GPU heatsink with sand paper/ a sanding tool.
Then take your sand paper, sand tool or whatever else you might be using and start sanding the lower corner, you need to sand about 1mm into the heatsink, this takes quite a while, cutting is the easier option in my opinion.
Here some pictures so that you get an idea:


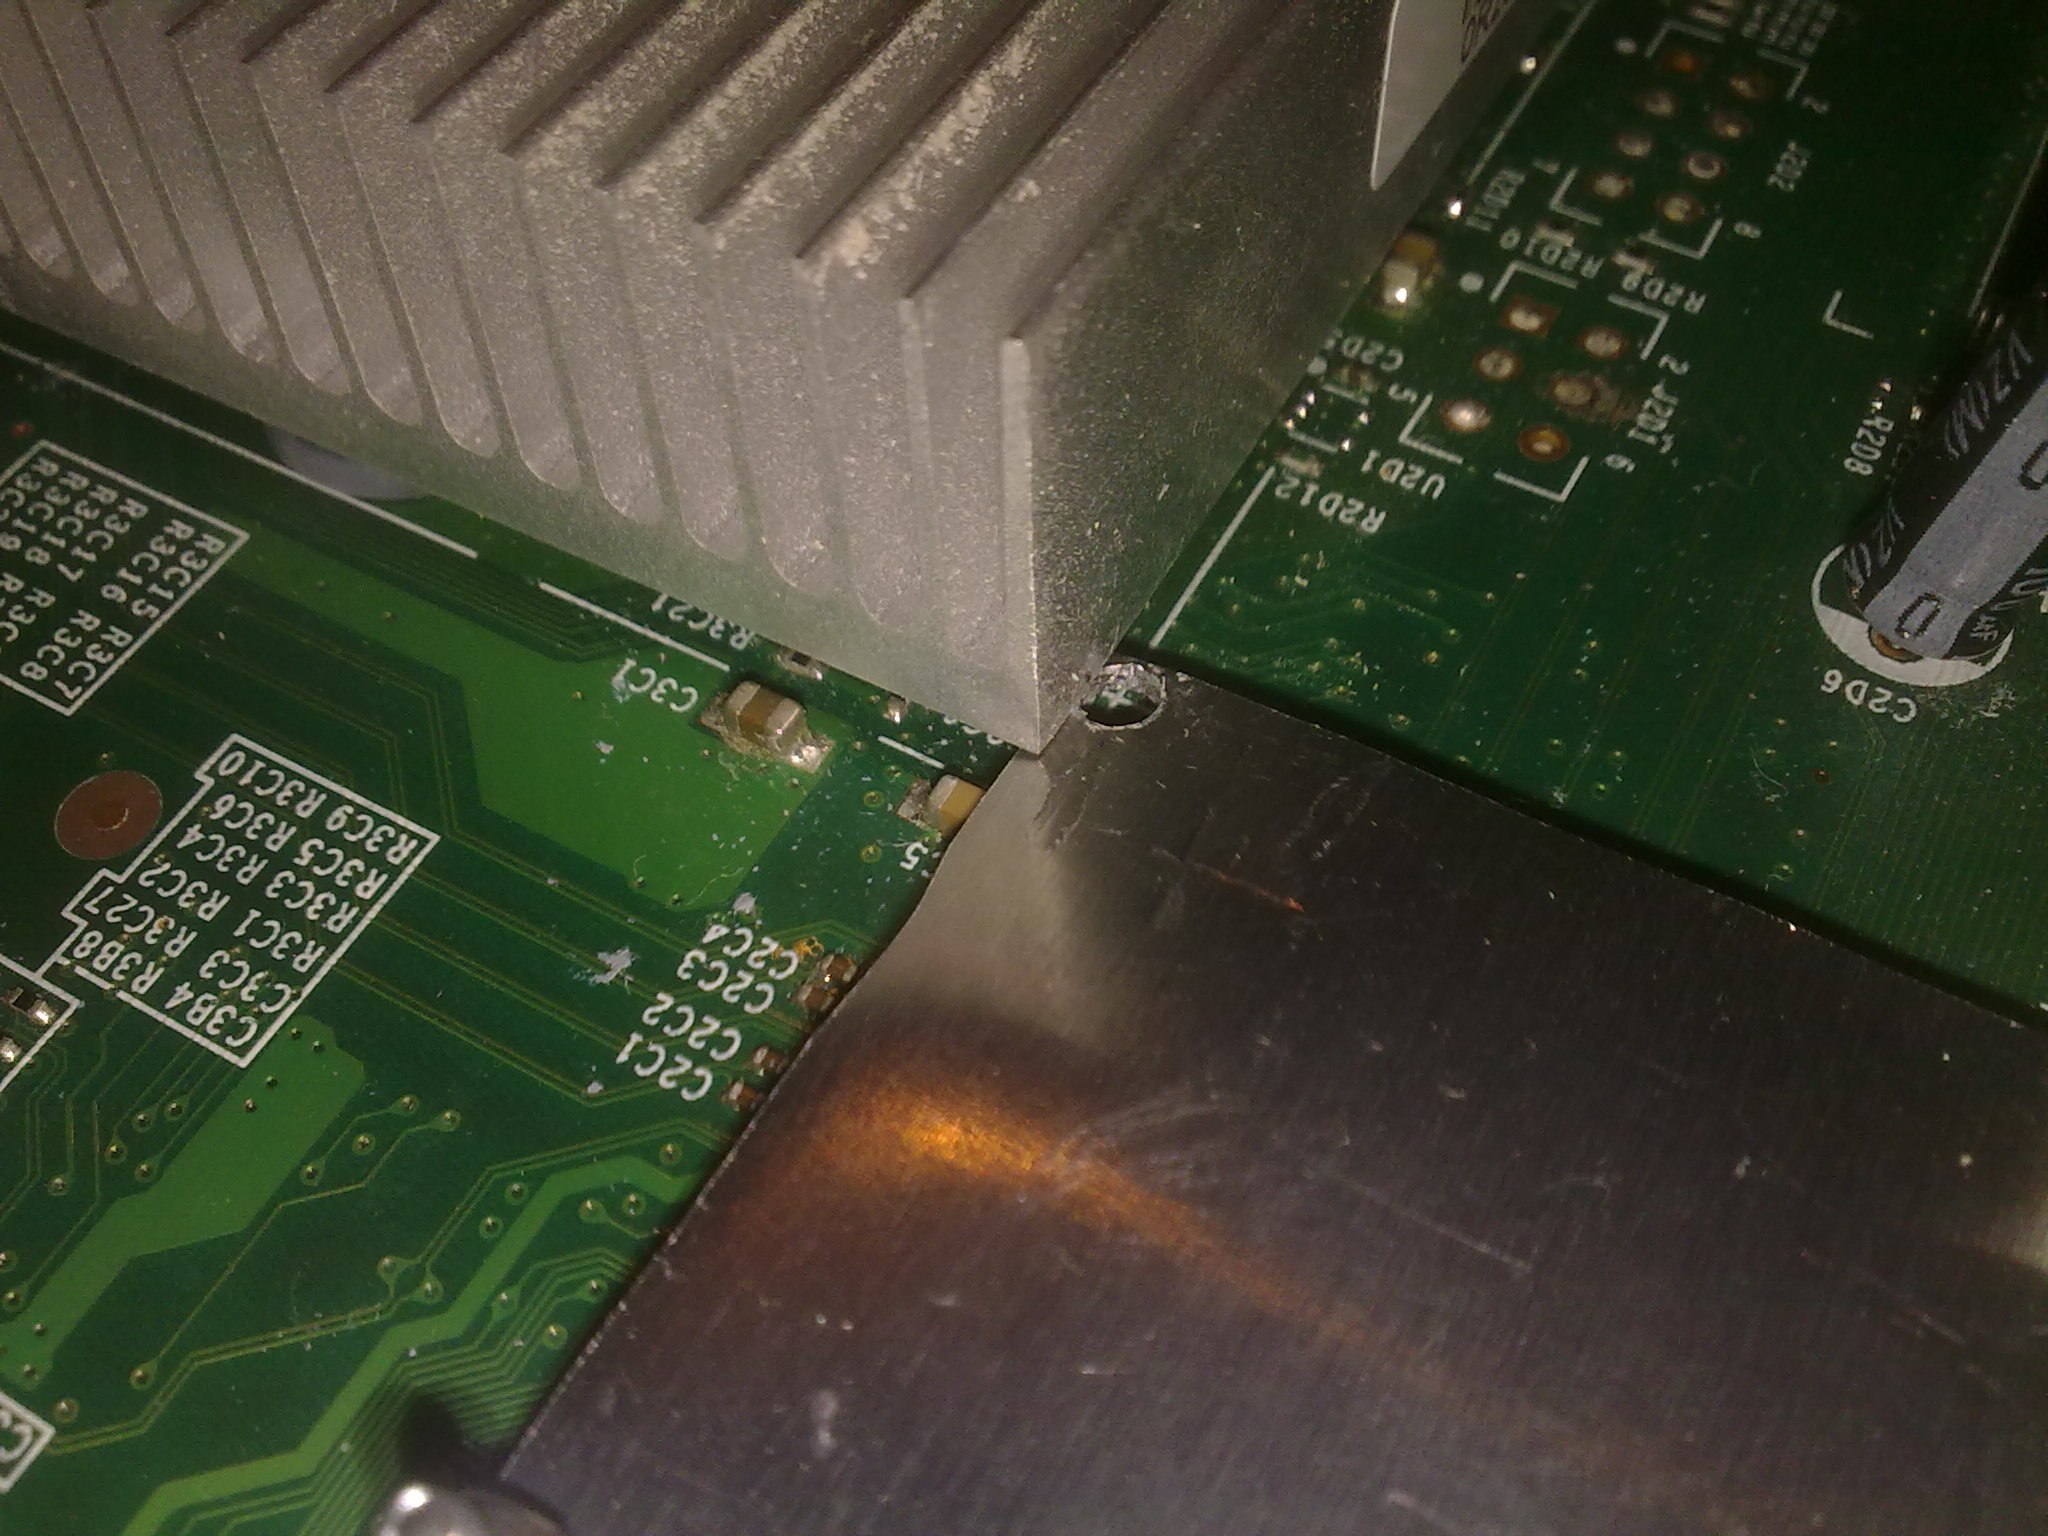
1.1.3 The result of the cutting/sanding.
This is what the result should look like approximately in the end:


1.1.4 Assembling the GPU heatsink.
Then you have to install the heatsink on the mainboard again, make sure that you cut/sanded off enough and that there is enough space.
How to install the heatsinks again etc is explained in the hybrid tutorial pretty thoroughly: Click me, I am a Link!
When you installed the heatsinks the final picture should look like this:


After that you can test out if the error is gone if it is not or you still get freezes, adjust the tightness of the southbridge screws around, only tighten one corner more and then retry etc.
The plate doesnt flex much thats why no washers are used, they too easily short things out and due to the great surface of the southbridge chip the plate doesnt flex too much.
If it is flexing slightly this is a sign that you are overdoing it with the tightness already.
Now your xbox should be fixed if it was south bridge related, Congrats!
1.2 The clipping method(3 screws, no heatsink modification required)
Your mainboard should already be disassembled so that you got a clear view on the southbridge(the GPU heatsink was taken off).
Now take a stripe of electric tape or something similiar and put it on the big capacitor this is the only one that could possibly get any close to the metal plate and cause a short.
Then take your southbridge plate
And position it on top of the southbridge chip(thats the one on the picture above, on Jaspers+ the chip looks a little different it is black)
Then stick the first screw through the bottom of the mainboard apply a nut on top and screw it down so that the screw doesnt fall out anymore, repeat that for the 2 remaining screws(leave out the corner closest to the GPU heatsink, check the pic below).
Leave the screws very loose, just barely tight enough so that the screws dont move too much.
Should look like this now:


1.2.1 Assembling the GPU heatsink.
Then you have to install the heatsink on the mainboard again.
How to install the heatsinks again etc is explained in the hybrid tutorial pretty thoroughly: Click me, I am a Link!
When you installed the heatsinks the final picture should look like this:

After that you can test out if the error is gone if it is not or you still get freezes, adjust the tightness of the southbridge screws around, only tighten one corner more and then retry etc.
The plate doesnt flex much thats why no washers are used, they too easily short things out and due to the great surface of the southbridge chip the plate doesnt flex too much.
If it is flexing slightly this is a sign that you are overdoing it with the tightness already.
Now your xbox should be fixed if it was south bridge related, Congrats!
2.0 The homemade version of the SB X-Clamp Fix

This is the layout of the mounting holes, in this way you will have to cut out the metal plate and drill the holes.

I have used the casing of an PCMCIA card because the 360 I did this for didnt have a metal shield anymore...
However you can also use other materials, like the metal from the windshield and I guess even wood will work out well, just make sure it doesnt bend too easily.(if you got one of the heatsinks that come with the Talismoon Whisper Max you could also use these :))
The X-Clamps would work as well but cutting them is way too hard since it is steel...
The 3.5mm are a bit more than the 3.1mm that the plate will be after the drilling, this is just a little additional space to allow improvements if you fuck the drilling up, in the end you will have to cut it to the size in the scheme otherwise the heatsink wont fit properly anymore...

Cut the piece out like that and then draw the holes on it using the Scheme above...
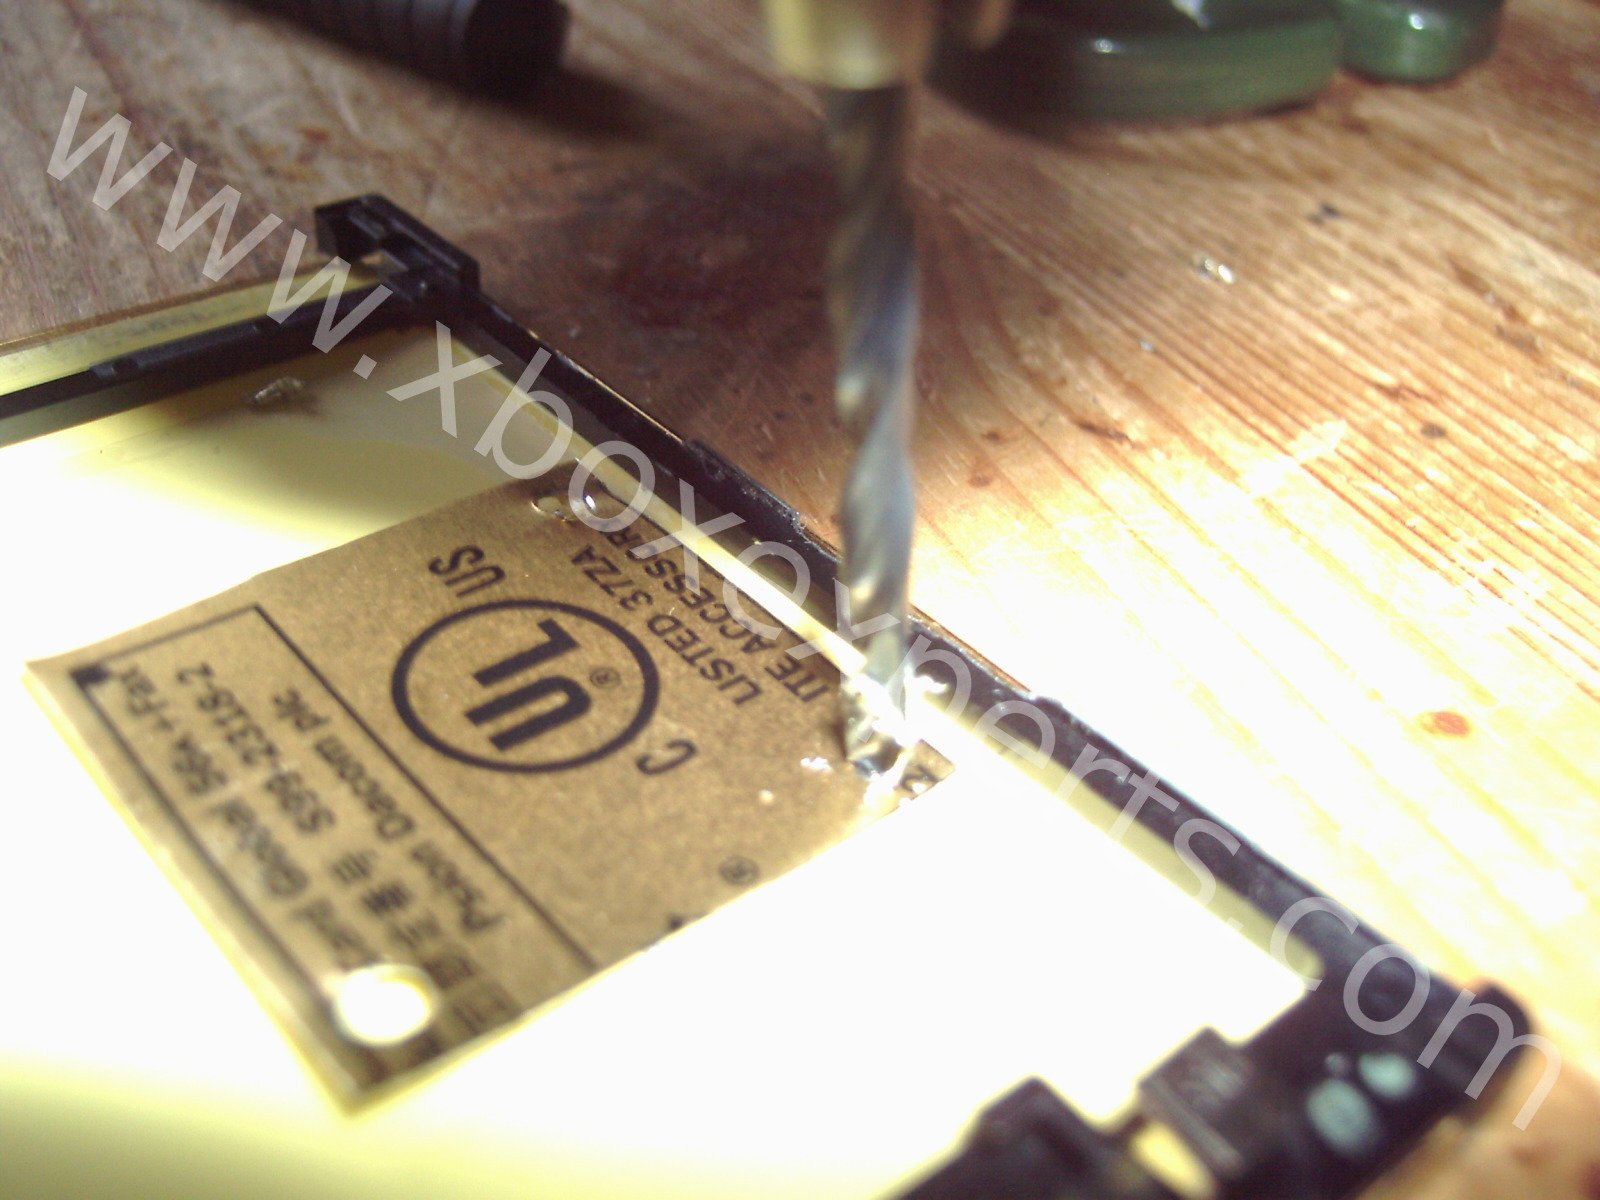
Then drill the holes carefully.

Now take a stripe of electric tape or something similiar and put it on the big capacitor this is the only one that could possibly get any close to the metal plate and cause a short.
Afterwards install the screws.
Fasten the screws like that with 4 pieces of tape to prevent them from falling out when you turn the board around...

Now install the metal plate, if it doesnt fit now you might have to adjust it a bit or redo it, took me two tries myself when I took the pictures, it is a bit tricky...

Then install the 4 nuts.
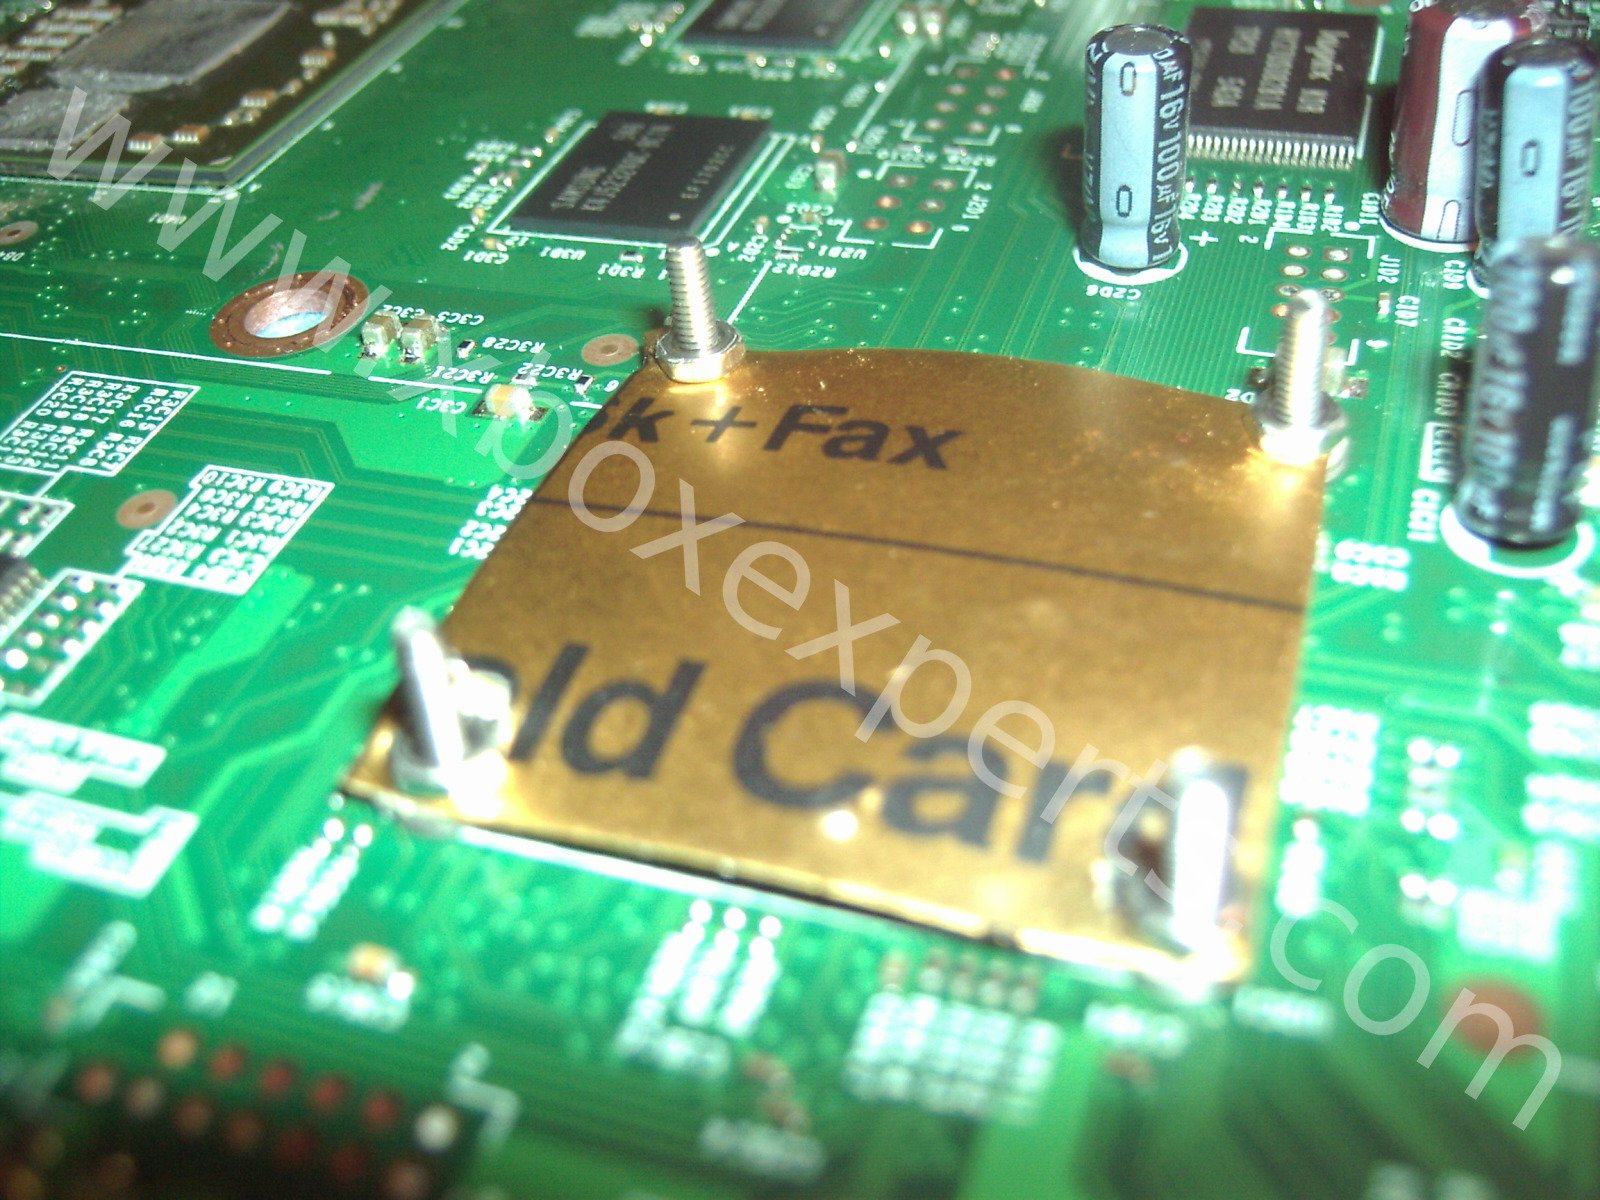
And tighten them down as much as you can, if the material is more solid be careful, only tighten the stuff snug...

Thats what it should look like when you are done.
If the heatsink doesnt fit anymore you will have to cut the metal plate a bit more on this side and make sure that the nut is aligned, if it doesnt work at all you will have to use a saw to cut a little piece out of the GPU heatsink!
You might have to remove washers or use a more solid material if it doesnt work in the first place because you need more pressure or adjust the pressure on a different area, for E71 for example the side that points to the NAND needs more pressure, for ethernet related stuff like E75,E76 etc the side pointing at the network chip and for 0021 and E73 the whole chip or the side pointing at the GPU...
I hope this helps some people who dont have a heatgun, the only permanent fix for that problem will remain a complete reflow of the chip with a heatgun though...
Notice: The Tutorials have been done many times and were often successfull, however we cannot guarantee the success and so dont take any responsibility for any damages that might be caused by it, you do it on your own risk!!!